


What you'll need:
--drawings or paintings (simple ones work best), black and white or color
--a scanner or digital camera
--computer with basic editing software
--inkjet printer
--inkjet ready fabric sheets like these.
--cover buttons and mold like these (I am using size 60 for rings and size 45 for pendants).
--scissors
--jewelry findings (blank rings and pendants)
--E-6000 glue

Begin with a drawing from scratch or choose something you've already finished.


Measure the button cover you are using and also the template that came with the button kit. Here I've cut out a circle according to the template on the button cover box. Use the button width to size your final image for printing and the template measurement to know how far apart to space your images to that you can cut out around them.


Here I'm using a free program called paint.net (www.getpaint.net) to add color and text to my image. These are some of my finished images. You can create jewelry from a single image or have fun making a bunch of drawings for your bling.


Next, ready your inkjet fabric. You can purchase fabric that's ready to go through the printer, or make your own and iron it to freezer paper. Using the measurements of your button template, create a document for printing. Publisher is a great program, but if you don't have that, use Word or Open Office or whatever you use to create a printable page. Lay out squares so you know how much space you need around your image for cutting the fabric circle. My button template is 2.5", so I made 2.5" squares on the page and I'll center my images in those. Cut and paste your images into the squares and resize them according to the size of your button face. My button covers are 1.5", so I want to make sure that each image is about 1.5". Print them out on inkjet ready fabric and heat set according to the package directions. Then cut them out, using the template you've created for the button covers.


Since I was using the paint program, I was able to fill in my squares completely so that the buttons will have a solid color background, but you can stick with a white background or overlap your artwork so that it covers the entire button face.
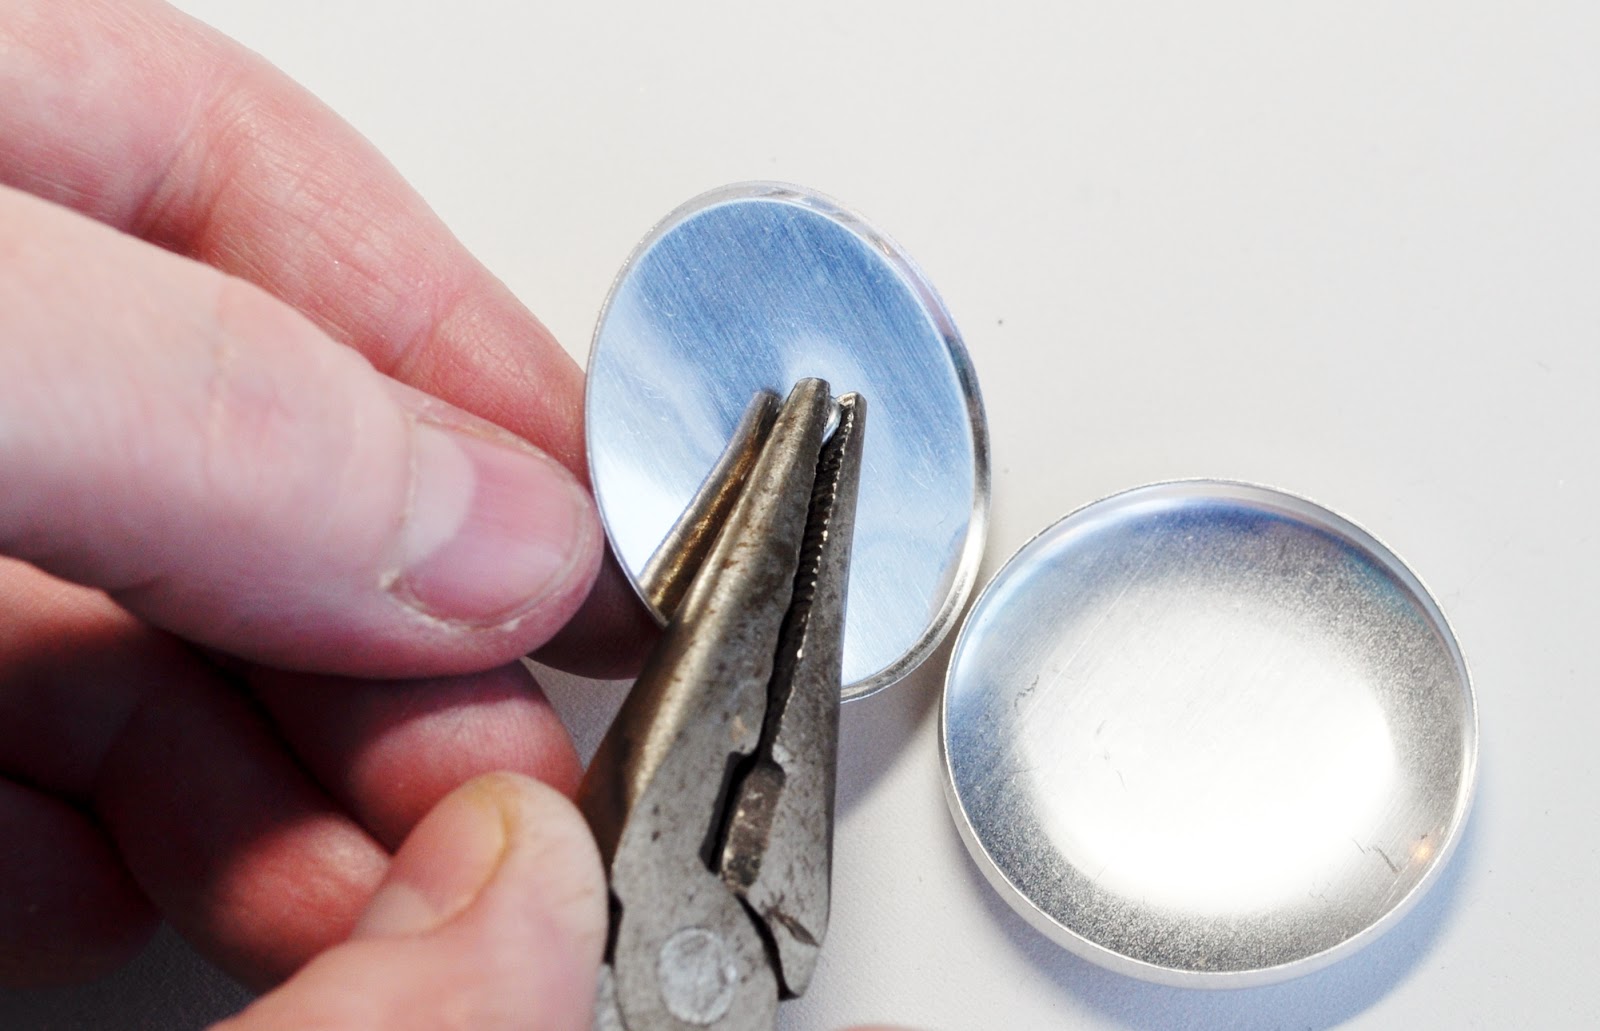
I am not using the shank part on the back of my buttons, so I'm using pliers to remove it. Now, follow the instructions with the button cover kit and use the mold to pop the back onto the button. Voila!


From this point, grab your E-6000 or other jewelry type craft glue and some findings and make your custom rings, pins, pendants and earrings! Glue and go. Your buttons should be damp cloth washable, but add a layer of gloss medium if you want to make them impervious to the elements. Just another way to find value in your daily sketchbook.

Thanks for the tutorial and the opportunity to win. My passion is loons. I make loon jewelry from silver metal clay, loon quilts, and draw loons. I also carve loon stamps. I love their haunting call.
ReplyDelete\thank you for the tutorial. I love to stitch and draw Hundertwasser style houses.
ReplyDeleteThanks for the great tutorial Kelli, I love your fun bright colors! It's no secret to anyone that I love to draw cats and I immediately thought of a cat drawing in my sketchbook that I can turn into a pendant as I was reading your post
ReplyDeleteWow, this is great! What a fun idea for sketches and small doodles to become wearable art.
ReplyDeleteMy current obsession is owls, in all mediums, drawing, painting, clay, collage, jewelry.
Great tutorial, thank you!
ReplyDeletelove this! I draw a lot of pinecones, flowers, and pods........
ReplyDeletexoxo
Great tutorial, thank you - my passion is dogs - most of all Golden Retriever.
ReplyDeleteOh this is fun! Would love to win some of your goodies! My compulsive drawing is flowers, flowers, and more flowers - also get into leaves from time to time. Trying to branch out a bit and add trees to the leaves...but sigh...
ReplyDeleteMy go to shapes to draw, stamp and quilt are LEAVES!! I love them! I'll see you at Art Camp for Women this Fall...and maybe I'll haved branched out and I'll have some new shapes to use in my art work!
ReplyDeleteCan't wait to do this tute! I draw a lot of HIPPOS, because they are my lifetime collection and muse. They would make some great jewelry.
ReplyDeleteThose are so colorful and fun. I just love your artwork! Thanks for sharing. ♥
ReplyDeletethank you for the great tutorial! I will try this w/ my daughter and her drawings. Thanks for the giveaway!
ReplyDeleteNeat idea. Faces, I love to draw/paint/collage faces. Thanks for the giveaway.
ReplyDeleteI love these--so happy! Thanks for all the inspiration you have shared on the Sketchbook Challenge. I love to draw wildflowers....
ReplyDeleteThese button necklaces are adorable. I'm not much for drawing, preferring collage fodder instead. However, about the only thing I can sort of draw is a hand. Thanks for offering this giveaway.
ReplyDeleteGreat tutorial, Kelli! I love your drawings. They are so filled with color and happiness. I am learning to draw. Right now I am practicing with nature - leaves, birds, flowers, etc. Have a colorfilled week!
ReplyDeleteLove this tutorial! Fun colors! I find that hands are a reoccurring thing in my sketchbook along with random whirly swirly waves and spirals.
ReplyDeleteYour work is so cheerful, Kelli. It always makes me smile! I use a lot of religious imagery in my work... I'd say my drawing passion is probably the hamsa. Perhaps it wards off evil spirits from my sketchbooks!
ReplyDeleteTotally fun and love your colours! And your blog of course=)
ReplyDeleteHi there! I love the pendants you created! If you don't mind sharing, I'd love to know how you did the back part that looks corrugated? Just curious!
ReplyDeleteOh sure--they were some cute bezels in the shape of bottle caps and I simply glued the buttons on. I got them at Hobby Lobby. Kelli
ReplyDeleteHow do you remove the shank? I tried removing mine and had a hard time.
ReplyDeleteIt wasn't pretty. Pliers and a lot of twisting and pulling.
ReplyDelete