1. Grab an old discarded book that appeals to you and cut out a page that looks interesting. I use a blade to slice it out, but you can rip it near the spine if you like.
2. Once you've cut or ripped out your page, trim it to size and glue it to a piece of watercolor paper.

3. Now, figure out what you're going to draw! I threw down some spoons, buttons and a spool of thread. That's because I can't really draw, so I'm going to cheat. I'll take a photo of this arrangement, turn up the contrast, print it on paper and trace.


4. Turn the paper over and scribble on the back with a bold pencil, covering all of the image area, then flip it over, place it on top of the background (math page) and trace over the image lines with a pen, transferring the basic shape in pencil.
5. Now you can get a little creative. Draw in your basic image shapes with a permanent marker. You can use your imagination to change things, or you can leave them as is. I started by tracing my exact shapes, but later I added a word above in handwriting and it felt lonely, so I drew in some hearts and stitch marks. You can doodle or add whatever elements make you happy.
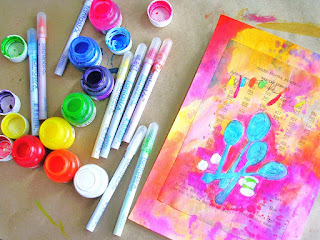
6. You're ready for the painting stage. I use liquid watercolors because they are vibrant, but also quick and easy! Start by painting all of the area OUTSIDE your image. Blend the colors, drip, dribble and splash them and blot them up with a paper towel. Make a mess but try to keep in generally outside of the image.
7. This is a little unorthodox, but iron it if it's become all rumpled, like mine. I'm a big fan of ironing.
8. Next we'll fill in those pesky blank areas, but we'll prime them first. Use some white ink or diluted acrylic to fill in the blanks. It will give the next layer a good background so that the color comes through. Don't apply it so heavily that you completely obscure the text background. I'm using Tsukineko all-purpose inks and Fantastix simply because they are super easy, transparent, and I heart them.
9. Now do some very basic painting by filling in the areas you've created with paint--again, I am using all-purpose inks, but could use fluid or diluted acrylics or even watercolors.
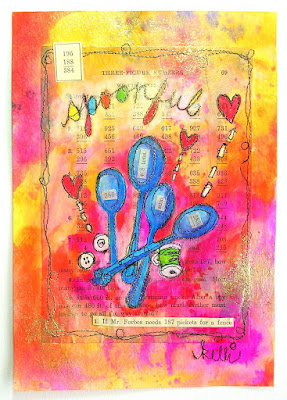
10. Step ten already? This looks a little weak, wouldn't you say? What did I tell you? I need something extra special for this drawing and it's going to be STITCHING. Hooray! I'll use black thread and a free-motion foot so I can stitch directly onto the paper and go around all the areas I've drawn in with black marker. Watch your thread tension--you may need to reset it for this. Ready set go!
Trim your little threadies and use a marker to fill in areas you missed or that need just a small touch, like the eyes on the buttons.
Oh, don't forget to sign it in thread!
11. Getting close here...this is starting to look interesting at least! Look at your work and decide if it needs a little more adjustment. I'm going to add more light and dark shadows to the spoons, since they look a little flat. I've also decided to collage more text on top, so I'll cut out some from the same book and add it to the center of the spoons. You can add more color with inks/paints--work it til you're satisfied, that's what I always say. Top the whole thing with a lathering of gloss medium. It will make the colors bright, secure the extra collage and hold all the stitching in place.
12. Quick, while it's still tacky, sprinkle the merest hint of gold Schminke Trocol Powder (or whatever shimmering powder you use).
Voila! Your first stitched painting. Now go make another!


.JPG)


